ZFS 存储池与 Dataset 基础操作
警告 ...
警告 ...
警告 ...
警告 ...
前言 由于电子设备比较多,蓝牙耳机配对的设备也比较多,这就引起了一个问题,本来连着手机听歌听的好好的,电脑开机之后就会自动抢占蓝牙耳机的信号,导致我还得重新在手机上连接耳机,严重影响听歌体验,于是就查询了如何禁用电脑自动连接的行为,希望这篇文章对你也有用。 如何操作 编辑 /etc/bluetooth/main.conf 这个文件: sudo vim /etc/bluetooth/main.conf 找到这些内容: # AutoEnable defines option to enable all controllers when they are found. # This includes adapters present on start as well as adapters that are plugged # in later on. Defaults to 'true'. # AutoEnable=true 修改配置文件,禁用自动连接: AutoEnable=false 重启设备,测试效果。

前言 在 Linux 系统中,经常会遇到一些软件只提供了可执行文件,而并没有提供可以通过包管理安装的途径,常见于 AppImage 封装的软件,这时候每次需要运行软件都需要通过终端来执行,非常麻烦。不过这个问题可以通过手动编写 .desktop 文件来解决,这样这些可执行文件就可以和其他软件一样拥有桌面图标。 用法 使用 vim 或其他文本编辑器直接编写 .desktop 文件后将其置于如下路径之一即可: /usr/share/applications/ /usr/local/share/applications/ ~/.local/share/applications/ 示例 来自 Arch Linux Wiki 的示例 [Desktop Entry] # The type as listed above Type=Application # The version of the desktop entry specification to which this file complies Version=1.0 # The name of the application Name=jMemorize # A comment which can/will be used as a tooltip Comment=Flash card based learning tool # The path to the folder in which the executable is run Path=/opt/jmemorise # The executable of the application, possibly with arguments. Exec=jmemorize # The name of the icon that will be used to display this entry Icon=jmemorize # Describes whether this application needs to be run in a terminal or not Terminal=false # Describes the categories in which this entry should be shown Categories=Education;Languages;Java; 其中,Type 和 Name 是必须的,其他都是可选项。 ...

在 Ubuntu 服务器上安装 qBittorrent-nox 更新系统 sudo apt update && sudo apt upgrade -y 导入 qBittorrent-nox 稳定版本的源 sudo add-apt-repository ppa:qbittorrent-team/qbittorrent-stable -y 导入 qBittorrent-nox 非稳定版本的源(每夜版) sudo add-apt-repository ppa:qbittorrent-team/qbittorrent-unstable -y 更新源 sudo apt update 安装 qBittorrent-nox sudo apt install qbittorrent-nox -y 创建用户和用户组 sudo adduser --system --group qbittorrent-nox # on fedora sudo groupadd qbittorrent-nox 将你添加到用户组中 sudo adduser your-username qbittorrent-nox # on fedora sudo usermod -aG qbittorrent-nox your-username 创建 service 文件 sudo vim /etc/systemd/system/qbittorrent-nox.service [Unit] Description=qBittorrent Command Line Client After=network.target [Service] Type=forking User=qbittorrent-nox Group=qbittorrent-nox UMask=022 ExecStart=/usr/bin/qbittorrent-nox -d --webui-port=8080 Restart=on-failure [Install] WantedBy=multi-user.target 重载 systemctl sudo systemctl daemon-reload 启动 qBittorrent-nox sudo systemctl start qbittorrent-nox 开启开机自启动 qBittorrent-nox sudo systemctl enable qbittorrent-nox 检查 qBittorrent-nox 是否启动 systemctl status qbittorrent-nox 登录到 qBittorrent-nox Item Value username admin password adminadmin 如何删除 qBittorrent-nox # Remove qBittorrent Stable sudo add-apt-repository --remove ppa:qbittorrent-team/qbittorrent-stable # Remove qBittorrent Unstable (Nightly) sudo add-apt-repository --remove ppa:qbittorrent-team/qbittorrent-unstable -y # Remove qBittorrent sudo apt autoremove qbittorrent-nox

在 Fedora 系统上运行微信 安装 wine sudo dnf install wine 调整缩放比例 输入下面的指令打开 winecfg winecfg 在 Graphics 一栏中调整合适的 dpi 以保证有舒适的使用体验。(4k 屏幕,192 dpi) 下载并配置字体 依次执行如下指令即可 sudo dnf install cabextract sudo dnf install winetricks winetricks corefonts gdiplus riched20 riched30 下载并安装微信 直接下载官方的 exe 安装包(在网页下载也是一样的) wget https://dldir1.qq.com/weixin/Windows/WeChatSetup.exe 使用 wine 启动微信 wine ./WeChatSetup.exe 接下来按照 Windows 的安装逻辑点击下一步安装好微信 安装结束后可以删除安装包 修改语言设置 修改这个文件 vim ~/.local/share/applications/wine/Programs/WeChat/WeChat.desktop 调整 Exec 这一部分,添加如下环境变量 env LC_ALL="zh_CN.UTF8" 最终结果应该是这样(注意路径) [Desktop Entry] Name=WeChat Exec=env LC_ALL="zh_CN.UTF8" env WINEPREFIX="/home/aimer/.wine" wine C:\\\\ProgramData\\\\Microsoft\\\\Windows\\\\Start\\ Menu\\\\Programs\\\\WeChat\\\\WeChat.lnk Type=Application StartupNotify=true Path=/home/aimer/.wine/dosdevices/c:/Program Files (x86)/Tencent/WeChat Icon=E03C_WeChat.0 StartupWMClass=wechat.exe 启动微信 安装过程中会自动添加 desktop 文件,直接打开即可。 ...
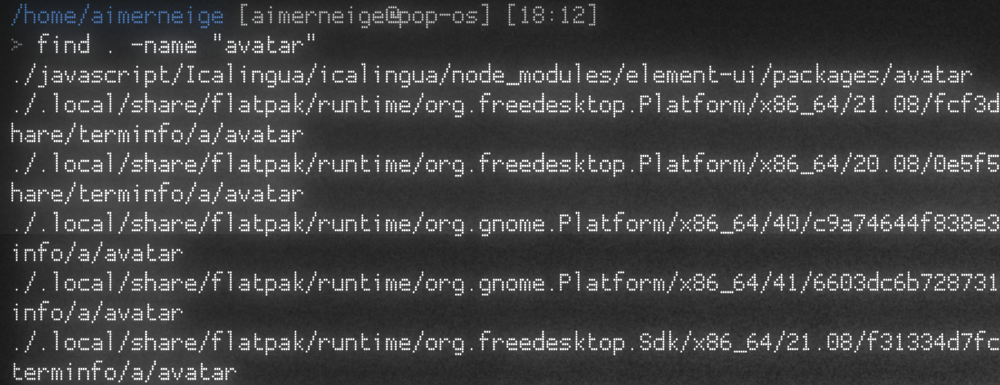
什么是 find 正如它的名字一样,find 指令用于查找文件。 Linux find 命令用来在指定目录下查找文件。任何位于参数之前的字符串都将被视为欲查找的目录名。如果使用该命令时,不设置任何参数,则 find 命令将在当前目录下查找子目录与文件。并且将查找到的子目录和文件全部进行显示。 来源: 菜鸟教程 The find command in UNIX is a command line utility for walking a file hierarchy. It can be used to find files and directories and perform subsequent operations on them. It supports searching by file, folder, name, creation date, modification date, owner and permissions. By using the ‘-exec’ other UNIX commands can be executed on files or folders found. From: Geeks for Geeks ...

平时在使用 Linux 写代码的时候,总有一点让我很难受,那就是当我准备写中文注释的时候,输入 // 的时候,输入法总是希望我手动选择是要输入 / 还是中文的 、,随之弹出来的框非常影响代码编辑,经常打断我的思路,类似的还有反引号等符号,不厌其烦的我去查找了一些资料,终于彻底解决了这个问题。 准备 阅读本文前,你要保证你在使用 rime 输入法。遇到任何问题请多查阅 rime 提供的文档。 本文所提到的内容在 fedora34 系统下,ibus-rime 包测试通过。 找到 rime 用户资料夹 不同的平台下,rime 用户资料夹的位置会有所不同 平台 rime 用户资料夹位置 ibus ~/.config/ibus/rime fcitx ~/.config/fcitx/rime fcitx5 ~/.local/share/fcitx5/rime 创建你的配置文件 如果你从来没有配置过 rime,那么你可以直接在 rime 用户资料夹下创建名为 default.custom.yaml 的配置文件,写入如下内容: patch: punctuator/full_shape: "`": "`" "~": "~" "!": "!" "@": "@" "#": "#" "$": "¥" "%": "%" "^": "……" "&": "&" "*": "×" "(": "(" ")": ")" "_": "——" "+": "+" "-": "-" "=": "=" "[": "【" "]": "】" "{": "{" "}": "}" "|": "|" "\\": "、" "/": "、" ";": ";" "'": "‘" ",": "," ".": "。" "<": "《" ">": "》" "?": "?" punctuator/half_shape: "`": "`" "~": "~" "!": "!" "@": "@" "#": "#" "$": "¥" "%": "%" "^": "……" "&": "&" "*": "×" "(": "(" ")": ")" "_": "——" "+": "+" "-": "-" "=": "=" "[": "【" "]": "】" "{": "{" "}": "}" "|": "|" "\\": "、" "/": "/" ";": ";" "'": "’" ",": "," ".": "。" "<": "《" ">": "》" "?": "?" 以上配置的具体细节请查阅文档。 ...
前言 Linux 下中文输入法一直是硬伤,各种方面都没有 windows 或 mac 下好用,最近在逛 github 的时候偶然翻到一个仓库 四叶草拼音输入方案,这个仓库提供的输入方案用起来十分舒服,但是在安装的时候也遇到一些坑,于是写了这篇文章来记录。 测试环境: .............. aimerneige@an ..,;:ccc,. ------------- ......''';lxO. OS: Kali GNU/Linux Rolling x86_64 .....''''..........,:ld; Host: TM1701 .';;;:::;,,.x, Kernel: 5.9.0-kali4-amd64 ..'''. 0Xxoc:,. ... Uptime: 2 hours, 11 mins .... ,ONkc;,;cokOdc',. Packages: 3537 (dpkg) . OMo ':ddo. Shell: zsh 5.8 dMc :OO; Resolution: 1920x1080, 1440x2560 0M. .:o. DE: GNOME 3.38.2 ;Wd WM: Mutter ;XO, WM Theme: Kali-Dark ,d0Odlc;,.. Theme: Kali-Dark [GTK2/3] ..',;:cdOOd::,. Icons: Flat-Remix-Blue-Dark [GTK2/> 3] .:d;.':;. Terminal: gnome-terminal 'd, .' CPU: Intel i7-8550U (8) @ 4.000GHz ;l .. GPU: NVIDIA GeForce MX250 .o GPU: Intel UHD Graphics 620 c Memory: 3698MiB / 15899MiB .' . 安装 fcitx5 sudo apt install fcitx5 启用 fcitx5 im-config 在开启的图形化界面中启用 fcitx5 ...